NEUROPAWN BIOPOTENTIAL KIT: GETTING STARTED
📄 Quick Start Guide (PDF)
Prefer an offline version? Download the full Quick Start Guide below.
⬇ Download Quick Start GuideWelcome to NeuroPawn
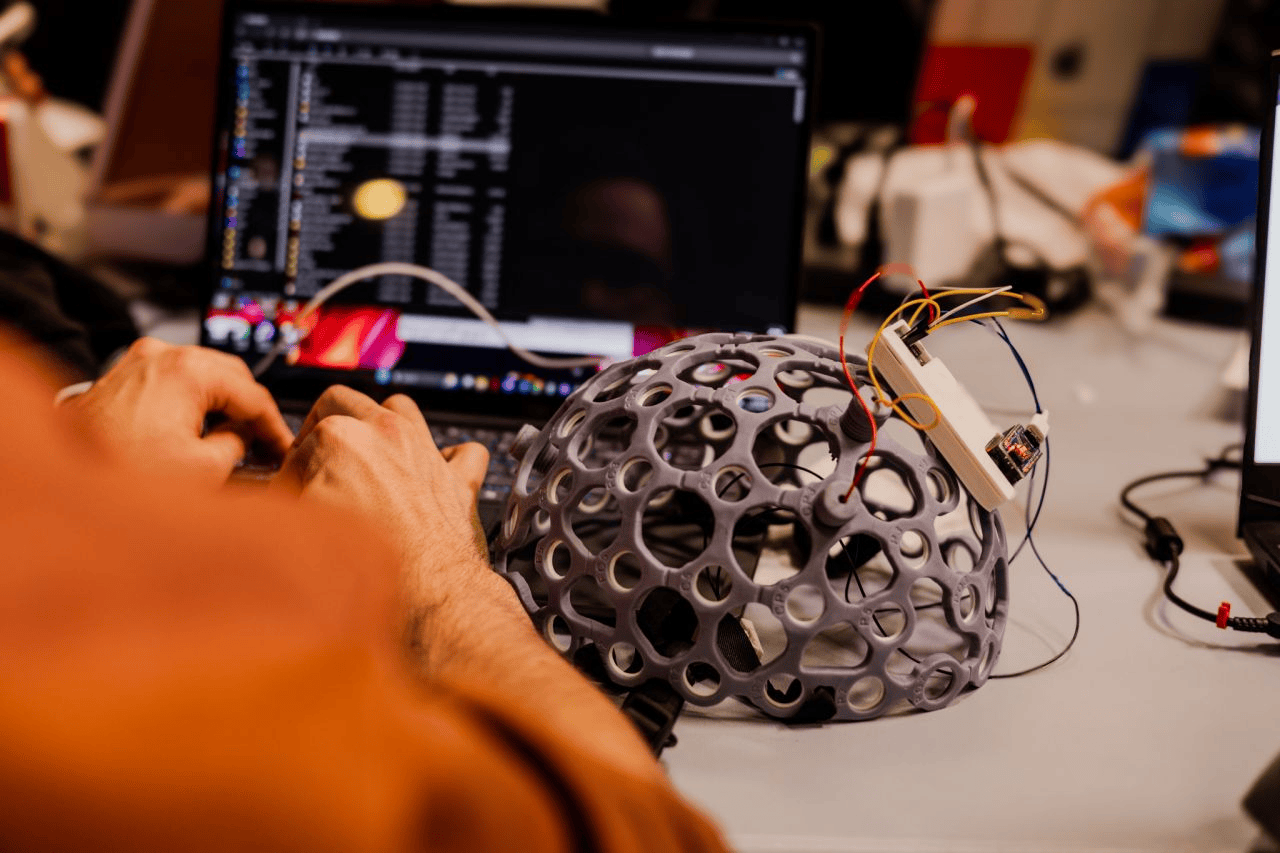
Your kit includes everything needed to start capturing EEG data. The Knight Board also doubles as a versatile biosignal amplifier for other projects.
📌 Resources:
GitHub: GitHub Repository
Support: support@neuropawn.tech
Before You Begin
📦 Kit Contents
- Knight Board with USB-C cable
- EEG headset with 8 dry spike electrodes
- 4 comfort electrodes
- Ear clip and conductive paste
💻 Prerequisites
- Download the EXG Visualizer
- Disable Hardware Integrity protection on Windows 10/11
Setup & Installation
Headset Setup
1
Choose locations for the dry spike electrodes (Fp1 and Fp2 are recommended starting points).
2
Place the 4 comfort electrodes opposite the dry spike electrodes for balance.
3
Screw all electrodes in lightly so they sit flush with the headset frame.
4
Wear the headset and ensure the midline is centered between the eyebrows. Tilt it so the Fp1/Fp2 nodes sit just above the eyebrows.
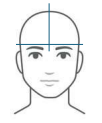
Proper alignment showing Fp1/Fp2 placement above the eyebrows.
5
Fasten the chin strap snugly.
6
Tighten the comfort electrodes in a star pattern.
7
Tighten the dry spike electrodes in a star pattern. Ask for help if needed.
8
Apply conductive paste to the earlobe and attach the ear clip.
Knight Board Setup
1
Connect the board to your computer using the USB-C cable.
2
Open the EXG Visualizer and select your device from the dropdown menu.
3
Activate channels one by one, waiting briefly between each.
4
Toggle all RLD checkboxes.
5
Turn off unused channels by switching them toward the headers.

Proper switch positions for unused channels.
6
Connect the electrodes to the positive rail of the active channels.
7
Attach the ear clip to the RLD/COMM headers.
✅ Verification & Testing
Signal Check:
- Clench your jaw — all channels should spike together synchronously.
- Close your eyes — look for alpha waves or slow oscillations.
🚩 Troubleshooting
Board not detected?
- Disable Hardware Integrity protection in Windows.
- Ensure the Arduino board is properly seated in the Knight Board.
Noisy data?
- Re-seat the electrodes properly.
- Make sure unused channels are turned off.
- Avoid rooms with heavy electronics or AC power interference.
- Check all physical connections.
💻 Custom Code Integration
Want to use BrainFlow or your own code?
- Check our documentation for example use cases with BrainFlow.
- Use device ID
NEUROPAWN_KNIGHTin BrainFlow.
👥 Join Our Community
Connect with other users:
- Discord: Join NeuroPawn Community
- Email Support: support@neuropawn.tech
Happy experimenting! 🧠✨
Need help? Join us on Discord